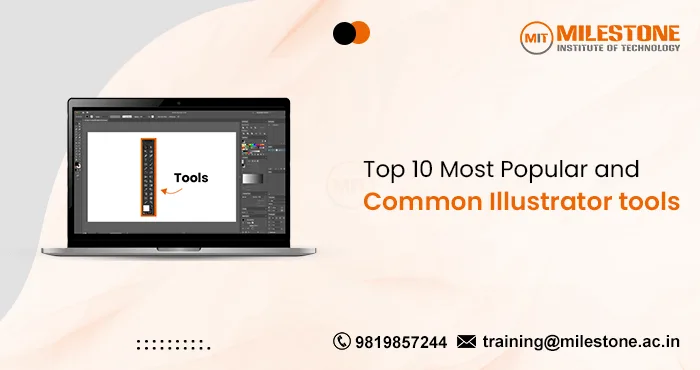
One of the most popular vector graphics software tool available is Adobe Illustrator, which is used by most of the graphic designers and professionals worldwide. It offers a wide array of tools that help designers create intricate and detailed designs, logos, illustrations, and more. If you understand the basics of Illustrator tools, it can contribute a lot to your workflow blooming with creativity and productivity. In this blog, we’ll explore the top 10 popular and common Illustrator tools, their key features, uses, and the shortcut keys associated with each tool.
Most Popular and Common Illustrator Tools Used by Graphic Designers
1. Selection Tool
The Selection Tool is actually represented by a black arrow which is fundamental in
Adobe Illustrator. It helps us to select, move, and manipulate the objects within our workspace.
Key Features
- Object Selection: Easily selects entire objects, whether they are paths, shapes, or text blocks.
- Move and Resize: Allows you to move and resize objects while maintaining their proportions.
- Bounding Box: Displays a bounding box around selected objects, making it easier to scale or rotate them.
Shortcut Key: V
Uses of Selection Tool
- Aligning Elements: Aligning multiple objects or layers is straightforward with the Selection Tool.
- Group Editing: Useful for selecting and editing grouped objects or multiple layers simultaneously.
- Positioning Objects: Perfect for positioning and arranging elements within your design accurately.
2. Direct Selection Tool
To choose and work with specific anchor points or path segments inside objects, using the Direct Selection Tool. It will help you in simply acquiring total control over your designs.
Key Features
- Anchor Point Editing: Allows direct manipulation of anchor points and handles for fine-tuning shapes and paths.
- Path Segment Selection: Select and modify individual segments of a path without affecting the entire object.
- Precise Adjustments: Provides detailed control over the shape and curvature of objects.
Shortcut Key: A
Uses of Direct Selection Tool
- Path Adjustments: Ideal for tweaking the curves and angles of vector paths for more intricate designs.
- Shape Customization: Modify specific parts of a shape without altering the entire object.
- Fine-tuning: Excellent for refining the details of logos, icons, and custom illustrations.
3. Pen Tool
The Pen Tool is one of the most powerful and versatile Illustrator tools, used for creating precise paths, shapes, and custom illustrations.
Key Features
- Path Creation: Draws precise and smooth paths, which can be straight or curved.
- Anchor Point Control: Provides full control over anchor points and direction handles for customizing path curvature.
- Bezier Curves: Allows the creation of complex Bezier curves for detailed and fluid designs.
Shortcut Key: P
4. Shape Tools (Rectangle, Ellipse, Polygon, etc.)
To create simple geometric forms like polygons, ellipses, rectangles, and more, you’ll need shape tools. Numerous designs are built upon these shapes.
Key Features
- Multiple Shapes: Includes a variety of shapes like Rectangle, Ellipse, Polygon, Star, etc.
- Custom Dimensions: Create shapes with precise dimensions by clicking on the artboard or entering specific values.
- Rounded Corners: Easily add rounded corners to rectangles for smoother designs.
Shortcut Key: Ellipse tool (L)and rectangle-tool (M).
Uses of Shape Tools
- Logo Design: Use shapes as the building blocks for logos and icons.
- Layout Design: Shapes are used for creating buttons, grid layouts, and other UI components.
- Background Elements: Design backgrounds or patterns using a combination of geometric shapes.
5. Type Tool
In order to integrate text into your designs, you must use the type tool. It offers various text formatting options, making it versatile for typography design.
Key Features
- Point Type and Area Type: A text may be created in either point (single) or area (text box) format.
- Text on a Path: Allows text to be aligned along a unique, customized path or form.
- Character and Paragraph Formatting: Provides detailed control over font, size, spacing, and alignment.
Shortcut Key: T
Uses of Type Tool
- Typography: Design and style text for logos, posters, and advertisements.
- Text Layouts: Create complex text layouts with multiple columns or flowing text.
- Interactive Designs: Incorporate text into UI/UX designs for web and app interfaces.
6. Gradient Tool
To create and modify gradients, which enable seamless color changes inside an object, utilize the Gradient Tool.
Key Features
- Linear and Radial Gradients: Make gradients that are both linear and radial with ease.
- Gradient Adjustments: Adjust the gradient’s direction, spread, and angle directly on the object.
- Color Stops: Add, move, or remove color stops to customize the gradient effect.
Shortcut Key: G
Uses of Gradient Tool
- Backgrounds: Create smooth gradient backgrounds for web pages, posters, or digital art.
- 3D Effects: Use gradients to give objects a three-dimensional look.
- Text Effects: Apply gradients to text for dynamic and eye-catching typography.
7. Brush Tool
Brush Tool is actually essential illustrator tools for painting and freehand drawing. It offers various brush types to create diverse strokes and effects.
Key Features
- Customizable Brushes: Use and create your own custom brushes, such as calligraphic, art, and scatter brushes.
- Pressure Sensitivity: Supports pressure sensitivity for dynamic stroke widths when using a tablet.
- Brush Libraries: Access a wide range of pre-installed brush libraries or create your own.
Shortcut Key: B
Uses of Brush Tool
- Illustrations: Create detailed illustrations and artwork with dynamic brush strokes.
- Texture and Shading: Enhance your creations with creative effects, shading, and texture.
- Hand-drawn Effects: Create the illusion of hand-drawn effects for a more unique and natural look.
8. Eyedropper Tool
With the Eyedropper Tool, you may add text properties, colors, and gradients to one object and sample it on another.
Key Features
- Color Sampling: Quickly sample and apply colors from any object on the artboard.
- Style Transfer: Text styles, including font, size, and color which can be copied and applied from one text block to another.
- Appearance Attributes: Transfer appearance attributes such as gradients, strokes, and effects between objects.
Shortcut Key: I
Uses of Eyedropper Tool
- Color Matching: Ensure color consistency across your design by sampling and applying colors from different elements.
- Style Uniformity: Easily maintain uniformity in text and object styles throughout a project.
- Efficiency: Speed up your workflow by quickly transferring styles between objects.
9. Blend Tool
The Blend Tool is used to create smooth transitions between objects, colors, and shapes, making it ideal for creating gradients and complex designs.
Key Features
- Object Blending: Blend multiple objects to create intermediate shapes or colors.
- Smooth Transitions: Create smooth and gradual transitions between colors or shapes.
- Customizable Steps: Adjust the number of steps or the spacing between blends for different effects.
Shortcut Key: W
Uses of Blend Tool
- Gradient Meshes: Create complex gradient meshes for detailed and realistic shading.
- Pattern Design: Use blends to create intricate patterns and abstract designs.
- Dynamic Effects: Add dynamic and flowing effects to your illustrations or typography.
10. Pathfinder Tool
The Pathfinder Tool is a powerful tool for combining, dividing, and manipulating shapes in various ways, making it essential for complex shape creation.
Key Features
- Shape Modes: Combine, subtract, intersect, or exclude shapes to create new forms.
- Pathfinder Effects: Apply various Pathfinder effects to divide, trim, merge, or simplify shapes.
- Non-destructive Editing: Allows for non-destructive editing of shapes, preserving the original objects.
Shortcut Key: Shift + Ctrl + F9 (Open Pathfinder Panel)
Uses of Pathfinder Tool
- Logo Design: Create complex logos by combining and subtracting basic shapes.
- Icon Design: Design custom icons by intersecting and merging shapes.
- Shape Manipulation: Easily create new shapes or alter existing ones by applying Pathfinder operations.
Where to Learn Adobe Illustrator tools to Become a Professional Graphic Designer?
There are a lot of training centers as well as institutes which offer a wide range of
graphic designing courses. As per the research and google reviews Milestone Institute of Technology is one of the top institutes in Mumbai which offer the most demanding courses. Their faculty focuses on providing best for their students by providing live projects, practical training, personal guidance, and many more. They provide courses like Photoshop, Illustrator, InDesign, and CorelDraw in graphic design. With expert instructors and a structured curriculum, you can quickly progress from basic techniques to advanced design strategies.
Frequently Asked Questions
What can I learn after learning Illustrator tools?
After mastering Illustrator, you can delve into other
Adobe Creative Cloud applications like Photoshop for raster graphics and InDesign for layout design. You can also explore advanced topics like motion graphics with Adobe After Effects or web design with Adobe XD. Expanding your skills to include these tools and areas will make you a versatile and well-rounded designer.
How does the Selection Tool differ from the Direct Selection Tool?
The Selection Tool is used for selecting and manipulating entire objects or groups, allowing for general adjustments like moving or resizing. In contrast, the Direct Selection Tool targets specific anchor points or path segments within an object, enabling detailed modifications of shapes and paths. Both tools are essential for different levels of design precision.
Why Is it important to learn all the tools in Illustrator?
While it’s not mandatory to master every in Illustrator tools, having a solid understanding of the most commonly used tools is crucial for effective design work. Learning the core tools—such as the Selection Tool, Pen Tool, and Type Tool—will cover most of your design needs. As you advance, you can explore additional tools to expand your capabilities and adapt to various design challenges.


